
I bent the sides and have applied 1/3rd of the liner
Bending the sides
I found this to be the most difficult step in the project so far. I used a bending iron that I ordered through Stewart Mac. The 2 side pieces were wide enough to split, yielding 4 pieces. I broke two in rapid succession. The third cracked slightly, so I moved on, I figured: at least get some practice and order more. Finally on the last attempt, I got the cut away area to form with no cracks! I managed to get the other side out of one were the crack would be on the inside. As it dried in the mold some cracks formed, but all can be epoxied and glued shut, and in some cases a brace positioned on it to give it more strength. When I clamped them to the mold, I used small maple cauls to protect the sides.
 My advice is bend very slowly. Rock the wood back and forth a little, and don’t try to form it in one shot. Re-wet the area and bend a little more (3-4 times for the tight curve near the cut away). Don’t slack off on the large curves, they take time as well. When an area has the right shape, let the iron dry it out completely, and it will keep its shape until it can be clamped into the mold. I recommend ordering two sets of sides, especially if you have never done this before. I also recommend, a thin piece of backing steel that is supposed to prevent cracking. Once I started bending, I wished I had ordered one.
Alternative Side Bending Method
A different method was recommended to me by someone who read this page and ran into the same aggravation. Thanks for the email! (See P. Christopher’s recommended anti cracking method).
Gluing the neck and heel blocks
 The I made the heel block by laminating three 1/2 inch thick pieces of Adler. I traced the curve of the side with a compass, and cut it on the band saw. I sanded it smooth to match the side, and glued it in place.
I laminated some pieces of vertical grained spruce brace stock to form a neck block. The grain runs in the same direction as the neck, so the joint should be stable. Both woods are lighter than mahogany, or bass wood. Bennedetto seems to prefer spruce.
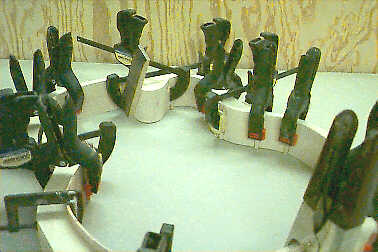
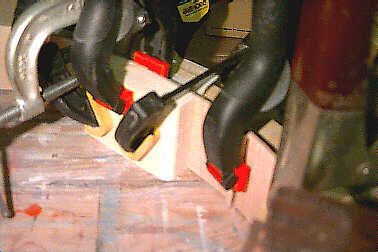
Lining and bracing the sides
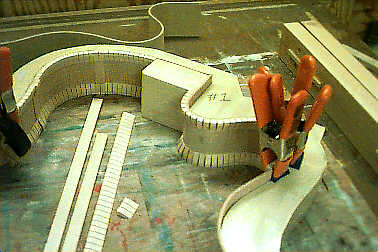 This part of the project is where things get fun again, especially after the side bending experience. The liner I ordered is made of bass wood. The side bracing is vertical grained spruce, and is 3/32″ thick. The width should be The same as two hunks of liner. If you look carefully, you might notice that the bracing extends from top to bottom of the side. The edges of each brace are chamfered between the bottom and top liner courses. Once the brace is in place two pieces of liner are glued
 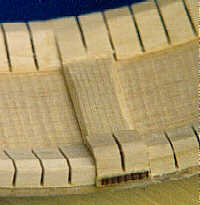 onto it along the top and bottom courses. Once in place they are sanded even with the rest of the liner. The bracing is positioned in the straightest areas, because these are weaker than curved areas. I am placing one extra on the inner bout to strengthen an area that cracked.
I am very happy to be this far along, especially considering my week at the beach with my family. I hope they can stand my obsession with this project until it is completed. I know there is a lot more to do.