
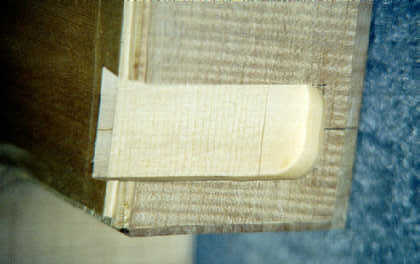
Body front is bound and mortise joint is routed
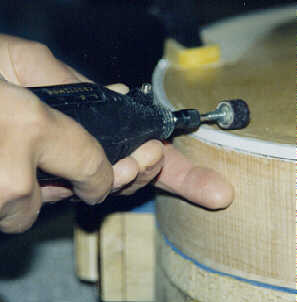
Routing laminate and binding channels
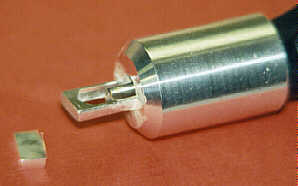 I got an attachment for my dremil, that is designed as a guide for routing binding channels. I needed to cut two channels: one for the laminate and another for the binding. The laminate channel is only about 1/8″ deep but extends from the end of the plate enough that I could only route it from the side as shown below. This is because the guide does not except a router bit any larger than 3/8″. To reduce the amount of contact with the raised arch, I shortened the guide (shown on the top right).
 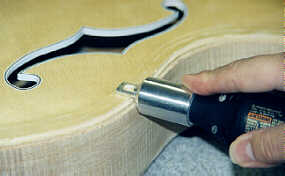 I used a 1/4″ router bit, which exposed enough blade from the guide (~1/8″) to yield the required depth for the laminate, as well as the width required for the binding channel.
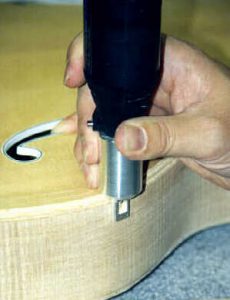 Turning the tool the other way, I then routed the binding channel, as shown on the lower right. It is cut all the way through the plate and into the side. The tight curves around the waist and the cut away, caused a narrowing of both channels. I used a sharp utility knife to correct the channels in these places by hand.
Routing the dovetail into the body
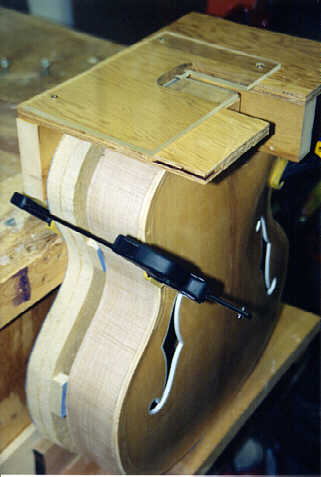 I decided this step was too important to take lightly, so I spent about a week constructing this jig for guiding my router. I started with the clamping caul I made for gluing the back plate on. I attached a few padded blocks so that the body could be clamped to the opposite side. I mounted with screws to the front of my work bench over a mall removable shelf. Then I used 5/4″ by 6 pine and plywood to create a platform that mounted on top of the caul. Heavy angle irons hold the pine boards together to form a ‘T’, with plywood glued to the top. A piece of 1/4″ Plexiglas is used for the joint template. I cut the template using the table saw, then mounted it on the plywood with counter sink screws.
The body is clamped to the caul below the platform. I left room for positioning it left to right, and up and down. I test cut a scrap piece of 2×4, and found it too loose. So I re-cut and remounted the template and and tested again. Vertical plumness with respect to the platform was checked in both directions with an iron angle.
 I used the same 3/4″ router bit that I used to route the neck. The final result was a very snug joint. It is almost a little too snug, but I will worry about that when it comes time to mount the neck to the body. I would prefer it to be less tight because I need to check the fit of the neck extension to the arched surface of the body before gluing it in place.
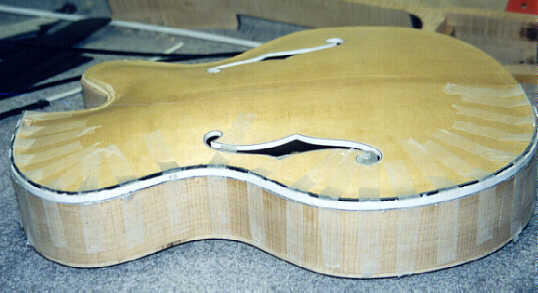
Gluing the front binding and laminate on
I first split a length of black and white laminate in two using my band saw. I then used binding cement to glue these thin pieces of laminate to the bottom of of the white binding. I could not find anything that came like this in the catalogs, so I decided to make it myself. I was careful to glue it such that there would be some excess laminate along the entire length of the binding on at least one side. When it had dried over night, I sanded the side that would be glued to the body flat. I sanded the other side slightly, just to remove most of the excess laminate. I did not want to sand the white binding at all, but I was afraid that if I did not sand the excess laminate, that it would break as I tried to bend it into the channel.
The laminate is miter cut at the neck end. The first time I had glued about 1/8 of the way, then I realized, I had the laminate facing the wrong way. I scraped the glue off and started again. I added glue for a stretch, taped it in place with filament tape, and repeated until I reached the tail. I let it dry over night, because I was sure there were some voids that were thick with glue. and needed that time to cure.
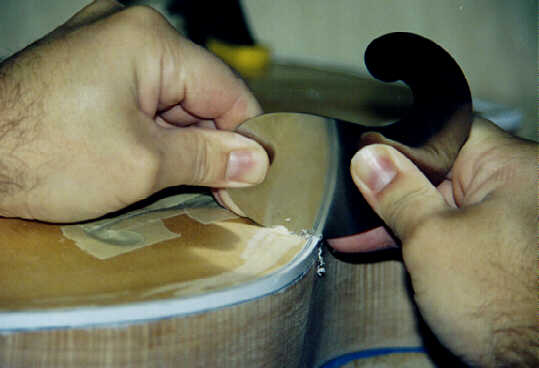
Removing the excess binding and scraping the recurve
 There was a lot of excess laminate and some excess binding as well. It was easily removed with a small dremil mounted sanding spindle.
I used a scraper and sand paper to scrape the binding smooth and even. At the same time I started to scrape the recurve along the perimeter of the face plate. It took me only a day to finnish forming the recurve. I followed the books instructions and tested the flexion of the plate by the bridge, and listened to the tap tone. The intent is to get some appropriate amount of flexion that moves the air inside and causes the back plate to reverberate. This being my first guitar, I don’t know exactly how flexible the front should be, or how much the tap tone should change.
I started some more work on the neck, and I will include it in the next installment. I want to thank everyone who sent me email. I also want to thank my wife for taking these last two pictures for me.