The head stock is shaped and bound
Gluing the finger board stop
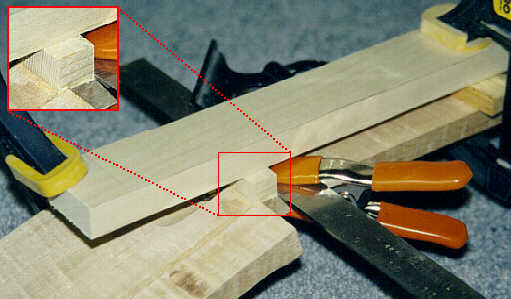
The finger board stop is added first to allow continuity for the head stock veneer and binding. A vertical grained piece of spruce is glued in place, using the carpenter’s square to insure the proper angle.
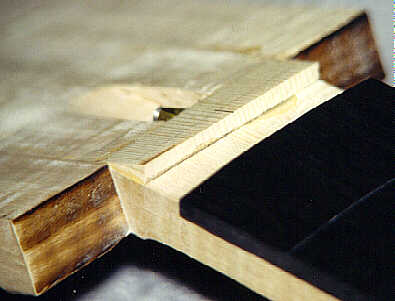 The stop is then chiseled to roughly form a continuation of the head stock surface. It is planed until it matches the level and angle of the head stock. When the finger board is glued in place it will butt against the stop. Eventually when the nut is installed much of it will be removed.
Thickness sanding the head stock
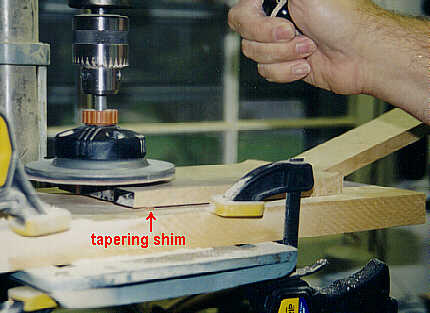 I could not find the Safe-T planer that Bob shows in his book. I looked at Sears, Home Depot, Wood Workers Paradise, and on the web. If anyone knows where to get one, please send me some email. Instead, I used a sanding wheel for and the drill press. I set the depth stop and used course, then medium, then fine grit paper. It generates a lot of dust, but it did get the job done. A Shim is glued to the face to create a tapered thickness.
This method of thickness sanding was also used to establish the tapered thickness of the neck. Unfortunately, I was rushing through things at this point and failed to take pictures. The neck was thickness sanded after the truss rod groove was routed, A gig was used with maple keys that fit snugly into the truss rod groove. The shim was placed under the gig providing the correct amount of taper, and the same technique with the sanding wheel was then used.
Note: Someone sent me email recently telling me were to get the
Safety planer (on-line at http://www.woodcraft.com)
Gluing the head stock veneer and cutting the shape
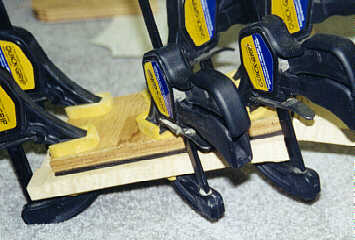 The ebony veneer is glued and clamped to the head stock surface. The size it turns out was just short of the length needed for my head stock design. However when the binding channel is routed it will remove that much at least.
Once the glue was dry I took a plastic template I made of the head stock shape, and traced it with a white pencil. I cut the shape out on the band saw, and trued it up with sanding spindles
on the drill press.
Drilling the tuning machine holes
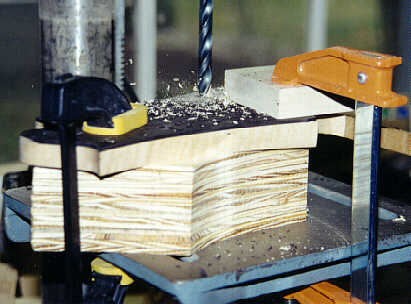 I decided not to make a fancy gig for this since I am not in production mode. I made sure the piece was firmly clamped to the drill press table, and that the table was locked firmly in position. The book mentioned drilling oversized holes, to avoid reaming them out to fit the tuning machines in. I ignored this, could not fit the machines in at all, and then drilled the oversized holes he suggested. I did mess up on one as you will see below.
Binding the head stock
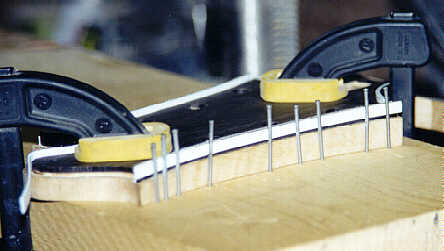
I used the same double course of white and black laminate, and a white outer binding, slightly thinner then what I used on the body. A single channel was routed with the same Dremil attachment used on the body. At the top there is a curve too tight to allow the guide to cut the proper width. Here I used a Dremil bit mounted in the drill press, height fixed, and cut a wider channel by hand guiding the wood. The two courses of laminate were applied first.
The book showed wire brads driven into the maple for holding the laminate in place while the glue dried. I noticed a risk of splitting the wood in some places and resorted where I could to the method shown here. Finishing nails were driven into the working surface along the edge of the head stock. The a piece of white binding is wedged between the nails and the laminate, pushing the laminate firmly into the channel.

The curvy end piece at the end required pre-bending the laminate and binding using hot boiling water, and was applied one piece at a time, I had to risk using brads here. The picture below shows some of the imperfections. I cut through the veneer too far below the beginning of the truss rod cavity (oh well the cover will hide it). The upper left hole was originally drilled too close to the edge and was re-drilled closer to the center. No one will ever see it, and the tuning machine can be shimmed tightly in place.
Well progress is slow, with all the holiday family gatherings and shopping. With a few days off I might get enough time to make some headway. I have tapered the finger board, and started sawing mother of pearl inlays, but nothing ready to show yet. I ordered gold MOP to combine with the white, but what I got did not look as deep gold in color as I had expected. No point rushing into something that can’t be undone. I will report back in another month.
