
I finished shaping the neck and gluing it on
I am sorry that it took me so long to post another update. February was a busy month, and I had to put off working on the guitar for a while. But now, I am back up to speed, and getting closer yet to the end.
Shaping the neck
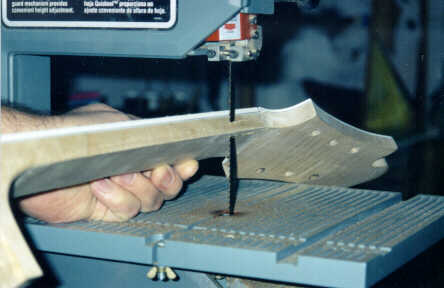 I started by trimming the excess material on the neck using the jig saw. It is important hear to go slow and not try to remove too much at once. If your not in a hurray you could just start with the rasp.
I used a piece of rough 2×10 lumber to make a jig for holding the neck in place as I worked on it. It is copied from the Benedetto book, which has a detailed diagram of it. It screws into the bench, and has foam padding along the top to prevent damage to the finger board surface.
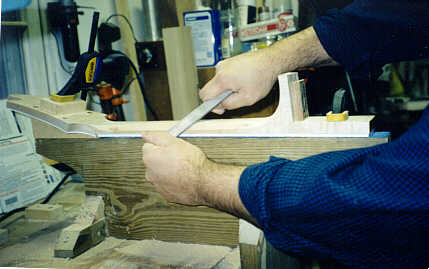
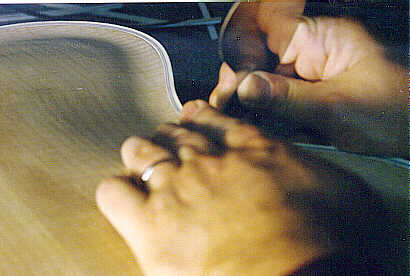
A hobby rasp with flat and rounded surfaces, and two degrees of coarseness on both sides worked well. Once I was near the shape required I rolled #60 grid coarse sand paper across the grain to smooth out the rasp marks. Both removed material quickly, so be careful near the binding.
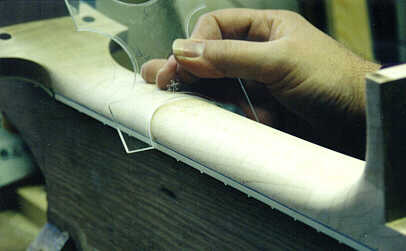
I also made a plexiglass template with four sizes of half circle on each side. The book also showed this, and described how to use it to check that your neck is symmetric along its entire length. Since I have a slightly wider neck, I was not able to make it exactly circular, but rather more oval, with a slightly flattened center. The thing to check as you do this is how it feels in your hand.
Finishing the work on the body
 Before attaching the neck, I had to finish what was left on the guitar body. I had to route the binding channels on the back plate and apply binding that matches the front. Once that was dry I ground off the excess and scrapped the recurve. On the back the recurve is scraped deeper than on the front. This is what will make the back vibrate in response to the air in the chamber. The final scrapping is delayed until the neck is glued to the body.
The sides are scraped smooth
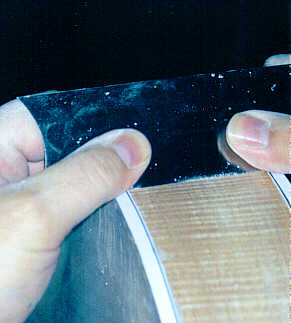 Once both sides had binding applied, the sides could be scrapped until they were straight and smooth. At this point I had used the straight and french curve scrappers enough that they needed a new edge. There is a handy tool sold in the catalogs called a scrapper burnisher. Once you run out a burr and turn the hook, you will notice how much more efficient the scrapper becomes.
Preparing the neck extension and joint
 I did a lot of work preparing the neck joint. It started out too tight so I carefully removed some material until it slid in more easily. Once it was in all the way I noticed the rear of the cavity was a little loose, so I glued some thin shims along the sides. This made it more snug as it was pressed all the way in.
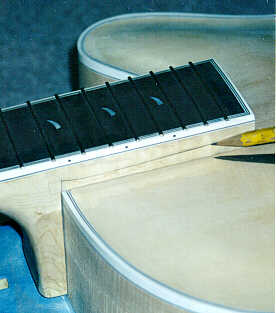
The next step is to shape the underside of the neck extension to fit the complex curve of the top plate. There is a height target you should shoot for. A straight edge placed on the fret board, should hang exactly 1″ above the plate where the bridge is to be located. I managed to get it right on the mark by doing the following.
With the neck on as far as it will go, I laid the straight edge on the frets and measured how much past 1″ it hung over the plate near the bridge area. Then I used a compass, set to that distance, to trace a line on the neck. The photo on the right shows the metal point resting on the plate as it is run perpendicular around the extension, leaving a pencil line that traces the exact shape of the plate. What you don’t get is the shape of the top within the perimeter. This is where the tedious part of fitting might arise.
I used a chisel, rasp, and scrapper to remove the wood from the underside of the neck extension. Be careful, the curly hard maple can chip out very easily, unless you work a little against the grain, taking small amounts away at a time. The book suggests carbon paper sandwiched between the surfaces to help mark the high spots. The neck should fit perfectly to the top plate, but when I saw the photos in the book, I noticed some extra space starting halfway down and continuing to increase as it reached the end of the neck extension. My guess is that this will allow the plate to vibrate more freely near the neck area.
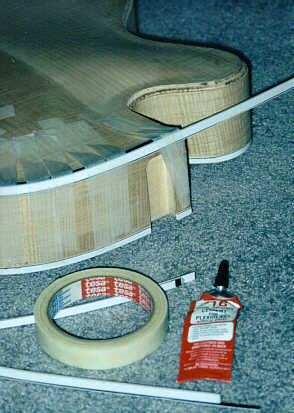
Once that is done, I measured and trimmed the neck where it meets the back plate, so I could add a layer of white+black binding to match the sides and an ebony cap.
Gluing the neck on
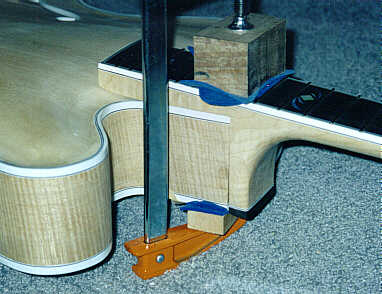 I coated the neck joint with tite-bond and added a large dab under the upper portion of the neck extension. With the glue it took a little bit of effort to get it in, then I clamped it in place and let it dry over night.
It ended up a fairly good fit. just a little bit of a gap between the side and the neck visibly by the cut-away. Its not enough to really draw your eye to it, but something I think that I would like to do better on the next instrument. 
Well I am getting close to the end now, I started on a pick guard. Now the body is ready for final tap-tuning and scraping. Then sanding, staining, and a lacquering. I guess that’s what I will cover in the next update. After that its mostly setup, and then its time to shop for a case. I am still pondering a color. Not too many people seem to like yellow, and I don’t want anything dark. I am leaning towards a very light orange tint, or natural blond.