I have done some work on the neck
I wish I had more to publish this month. Actually I have done more work than is shown, but I don’t have the pictures developed yet. I promise an early update following this one.
Other tools I have been using
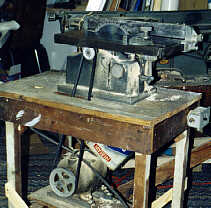
Two things I forgot to mention earlier, are the other tools that I have been relying on. My father in law gave me a very old, very small table saw years ago, that I had in my shed. I dragged it into my shop (closed in garage), and cleaned it up thoroughly. I changed the blade belt, and got it in fine shape. It is not much, but has really served me well. Thanks dad!
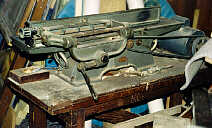
I also grabbed my father’s old jointer out of my Mom’s garage. It is a really big one, and really needs new/resharpened blades, but it still has been a critical tool for many steps. I would not want to have to do this project without both of these things. Luckily, I did not have to spend any money to get them.


Routed the dovetail and truss rod groove
 The neck consists of a two piece laminate, cut from a blank of hard curly maple. I started gluing the rough neck blanks together at the very beginning of the project. Unfortunately I was not careful about photographing the process at the time.
The photo on the right shows the dovetail joint of the neck, and the filler piece of spruce that anchors the truss rod in it’s groove. I used a cheap router table and my Craftsman router to cut the dovetail, but I think I got lucky doing it this way. When I get my photos back I will show the more serious jig I rigged for routing the cavity in the body that accepts this dovetail. The joint above the dovetail where the truss rod grove ends was cut with a table saw to accommodate the neck extension.
The truss rod groove is slightly bowed in the manner that Bob’s book suggested (about a 16th” shallower near the head stock tapered from half way down the length of the neck). The claim is that this makes the neck adjustment more sensitive when tightening or loosening the the rod. For all you first time builders, I had a hard time finding the sized die needed to cut the threads, 3/16″. So I ended up ordering it from the luthier supply.
Padding the truss rod
I padded the truss rod with foam padding available from the local hobby shop. It was taped on with filament tape, and fit snugly into the over sized groove. It is supposed to reduce the risk of unwanted rattling when playing.

Adding the neck extension

The neck extension is made from the same blank. I was careful to try and match the color and figure of the neck where the two pieces will join. I laminated two pieces with a thin piece of maple in between to give it more width. I had to build this jig shown in the book to allow clamping from two directions.
 Ahhh…, a nice tight fit! I have since added the extensions on either side of the peg head, and thickness sanded it. I have also added a fret board stop, routed the body mortise, binding channels on the front, and glued the binding on. The next installment will include photos and details of all this and hopefully more. I am still aiming for finishing by the end of the year.
